FoamAR is an Augmented Reality (AR) app for rapid prototyping of 3D models in the physical space. Using FoamAR, users like furniture designers, interior architects, and product engineers can build 3D models with real-life dimensions through a combination of intuitive freehand manipulations and traditional 2D UI interactions. Unlike existing CAD software whose means of interaction remains at the screen level, FoamAR enables users to sculpt their ideas directly with their own hands while referencing their surrounding environments in an immersive manner.
As the designer and the engineer of this project, I built FoamAR on the interaction and engineering foundations laid by my research project FocalPoint. Built using C# in Unity XR, FoamAR is available for both iOS and Android systems. To create this project, I went through the complete product design cycle - problem discovery, user research, solutions design and iteration, prototype building, and user testing.
AR Interaction Designer & Engineer
Sep 2019 - Present
ARKit, ARCore, Unity, Leap Motion SDK, Figma, Illustrator, After Effects
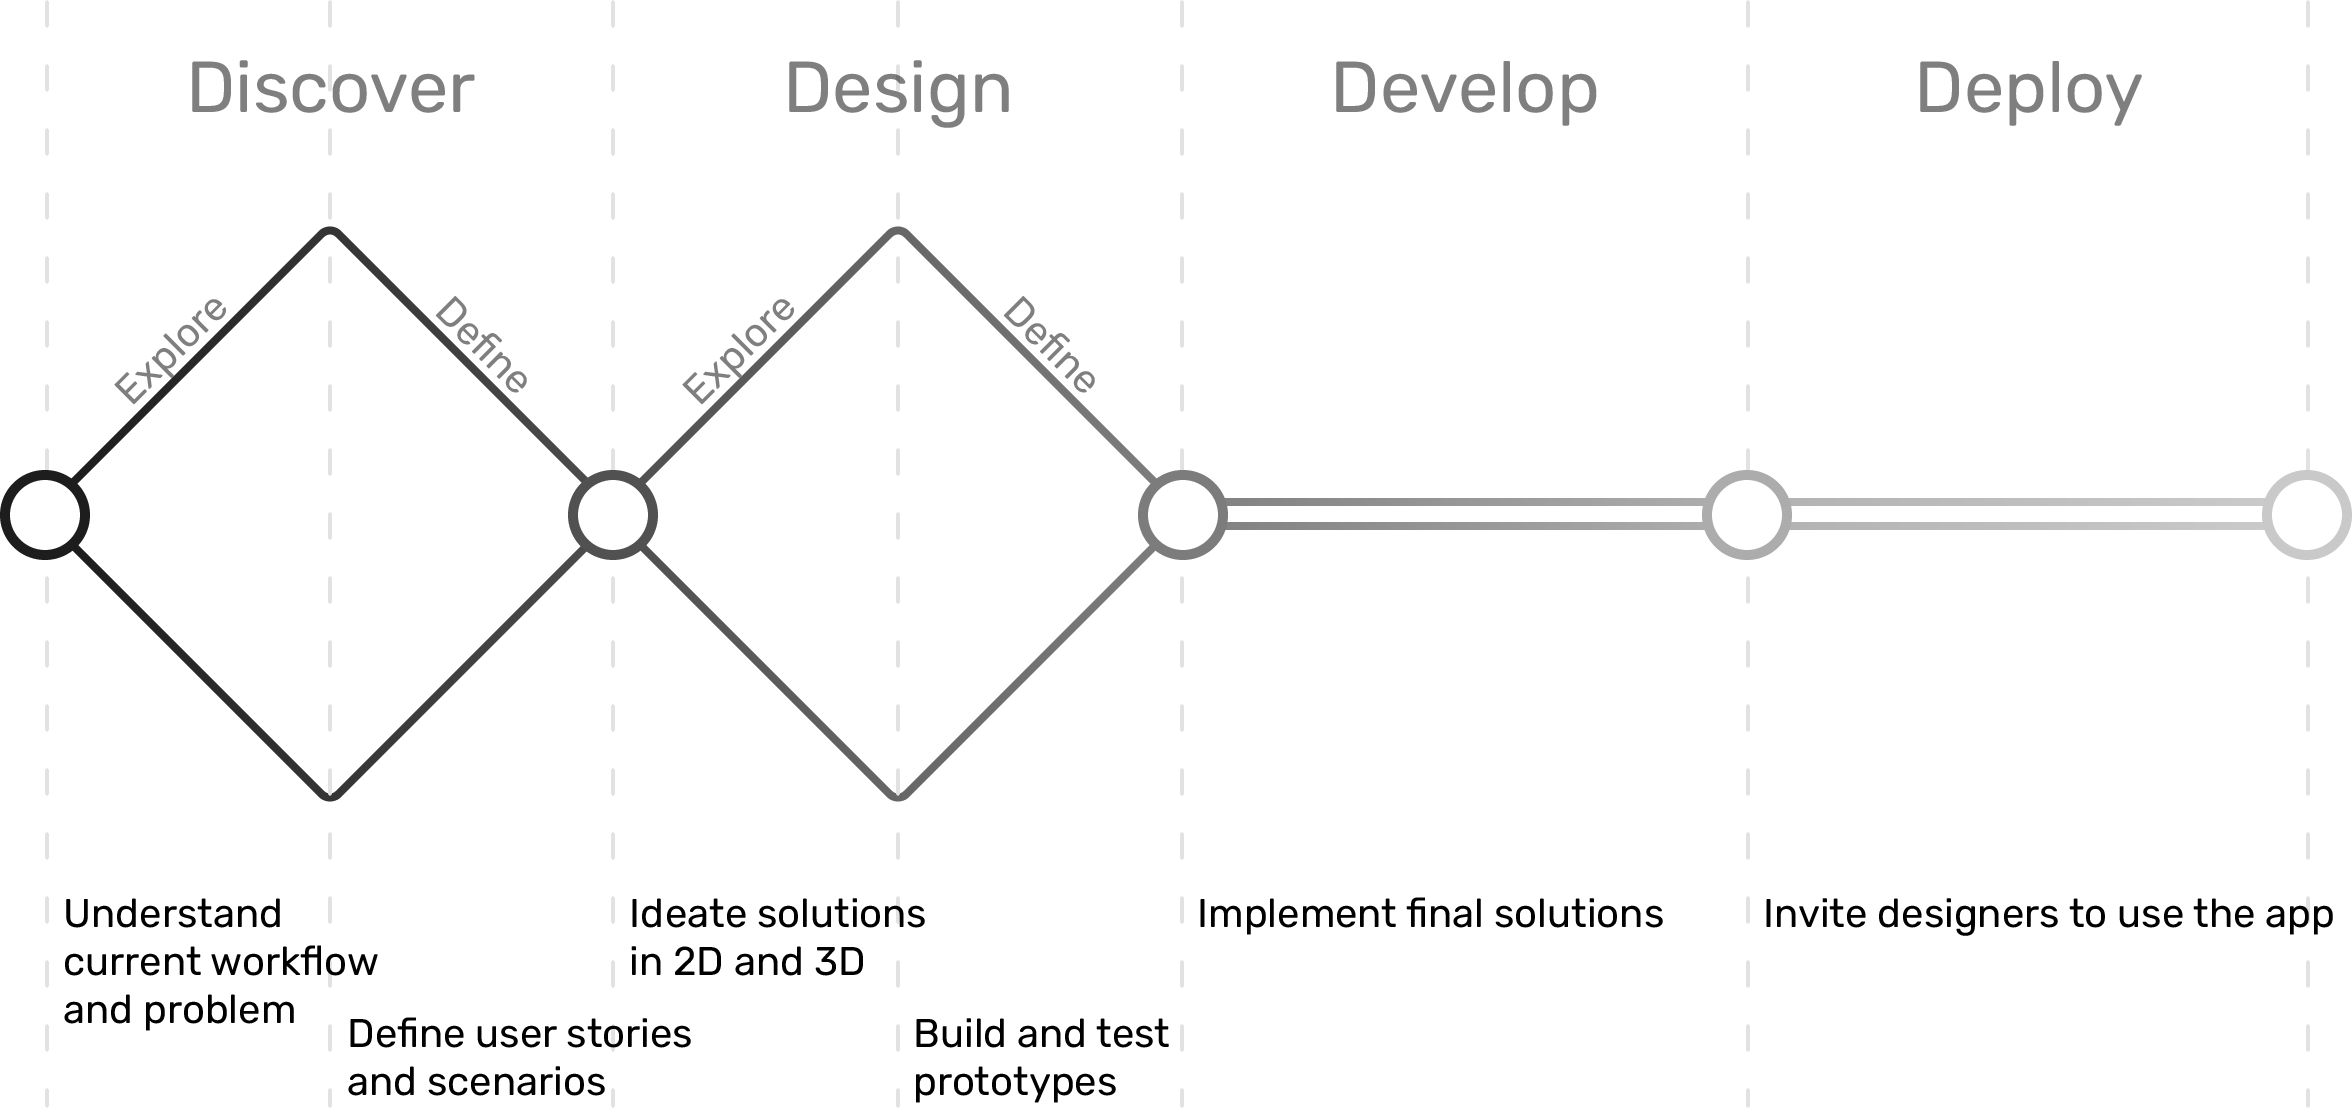
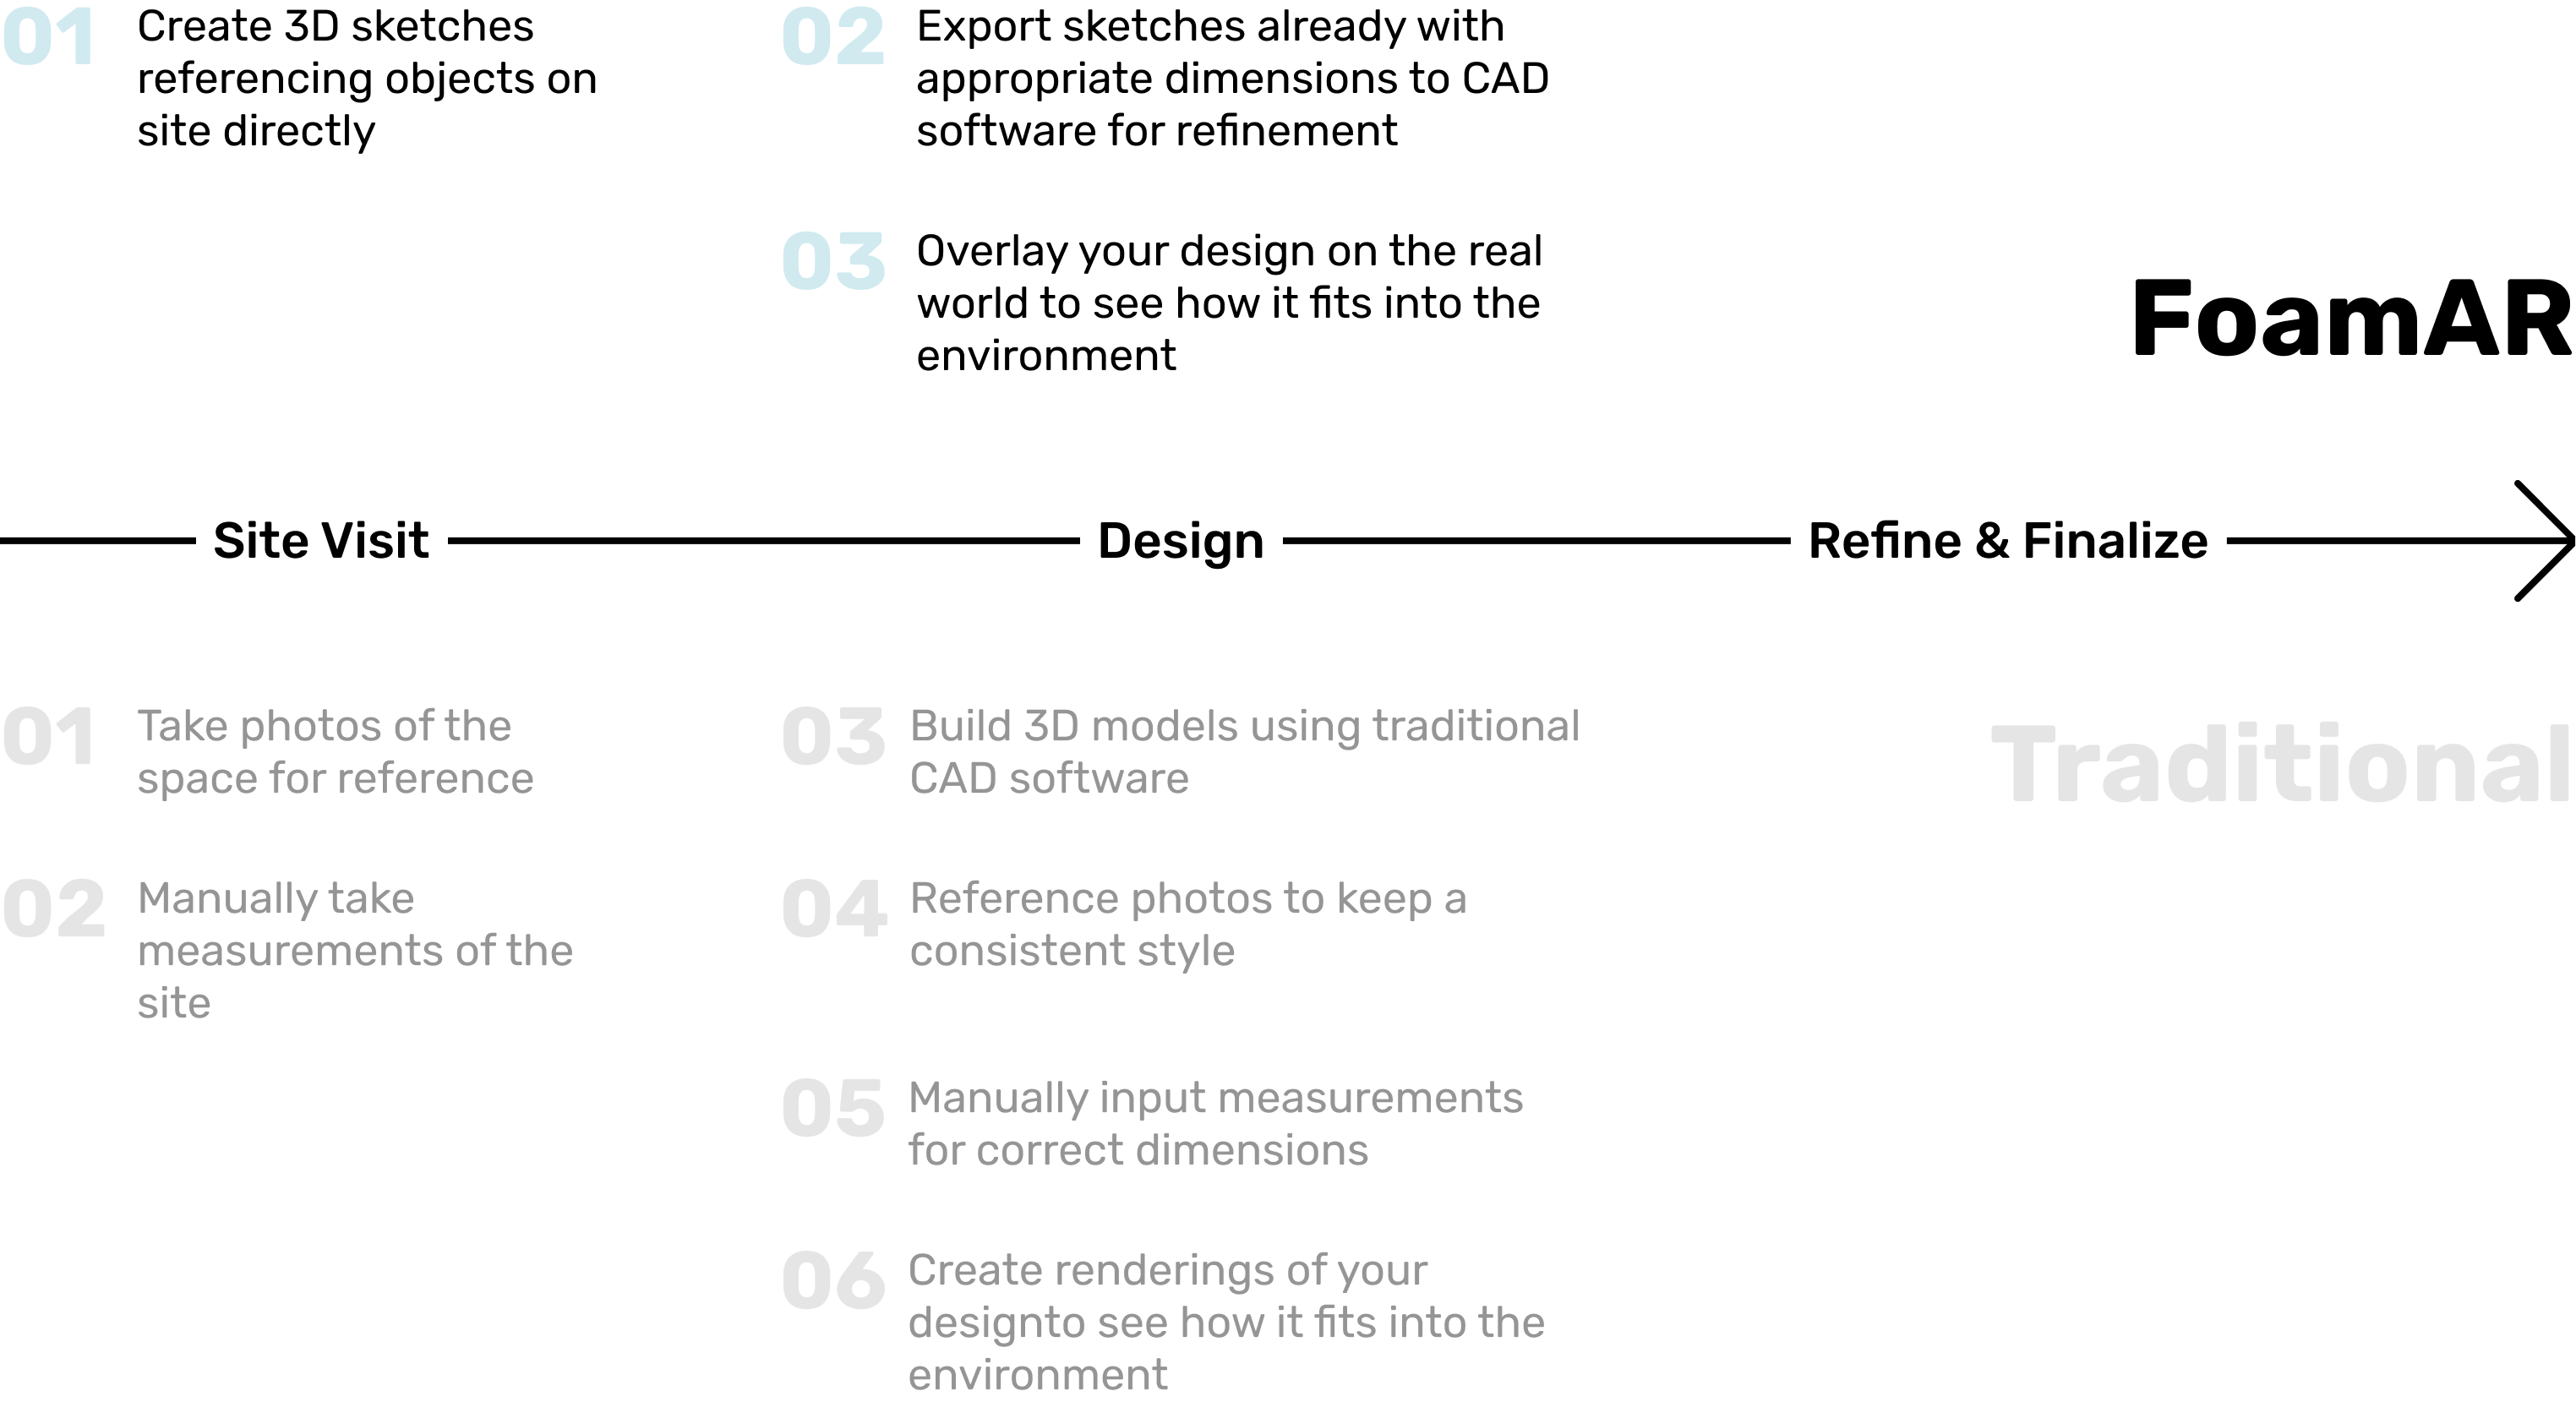
As an industrial designer by training, I found the traditional workflow of designing a new physical product to be inefficient and cumbersome. After interviewing 20 industrial and product designers, I summarized the standard workflow that they would take to design a chair for a new coffee shop.
As shown in the chart below, their interactions with the physical site remained on a 2D level. They only start designing in 3D when they are back in studio without any 3D references anymore. Essentially, the context for their design is compressed to photos and measurements and consequently compromised. Their current solutions to this issue are either creating realistic renderings or building physical prototypes, both of which are time-consuming and resource-intensive.
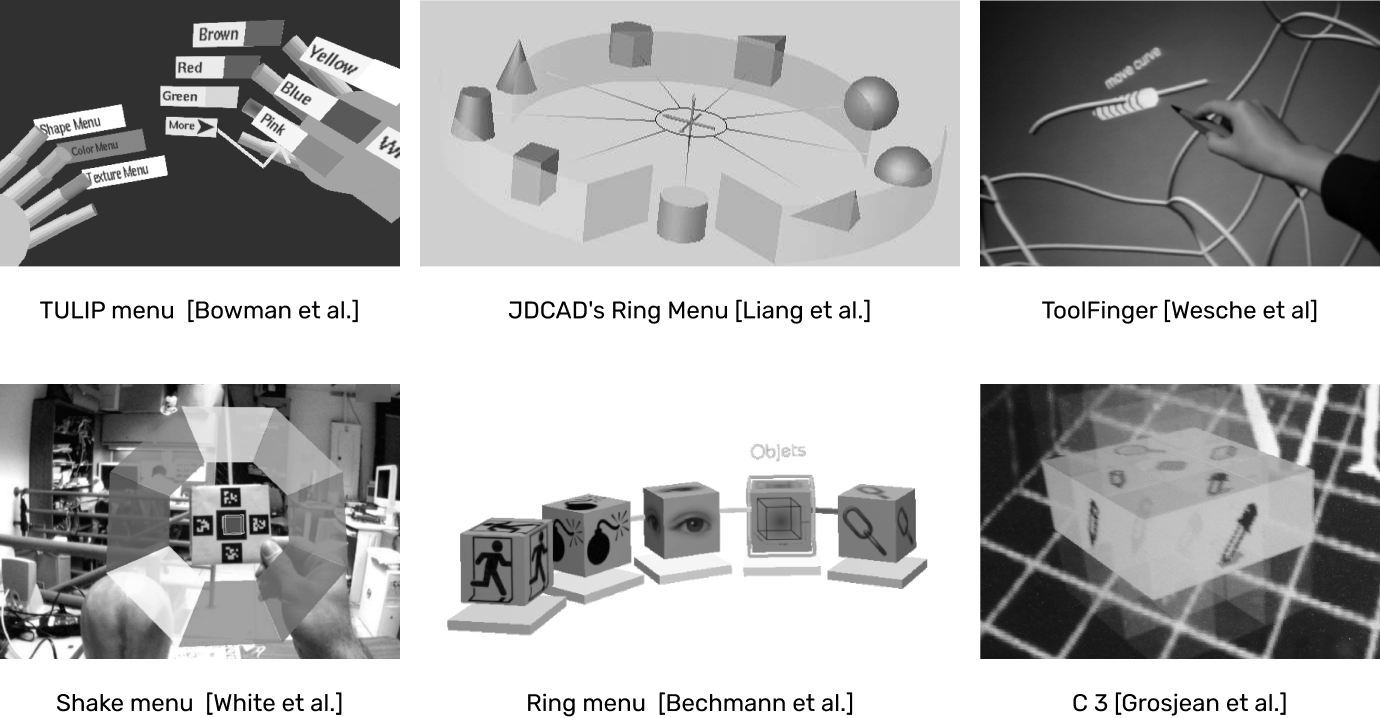
To address the workflow problem mentioned above, I looked at means of creating designs while preserving 3D context references. With my previous experiences in AR, I thought that Augmented Reality would be an ideal medium to tackle the problem because it allows people to create 3D designs in the environment they would be placed in or used for. With this in mind, I did research in the direction of control and behavior interactions in AR. If I am building a CAD software for AR, what would be the equivalent metaphor of menus? What about toolbars and different tools? Click here to see the full AR Interactions Research
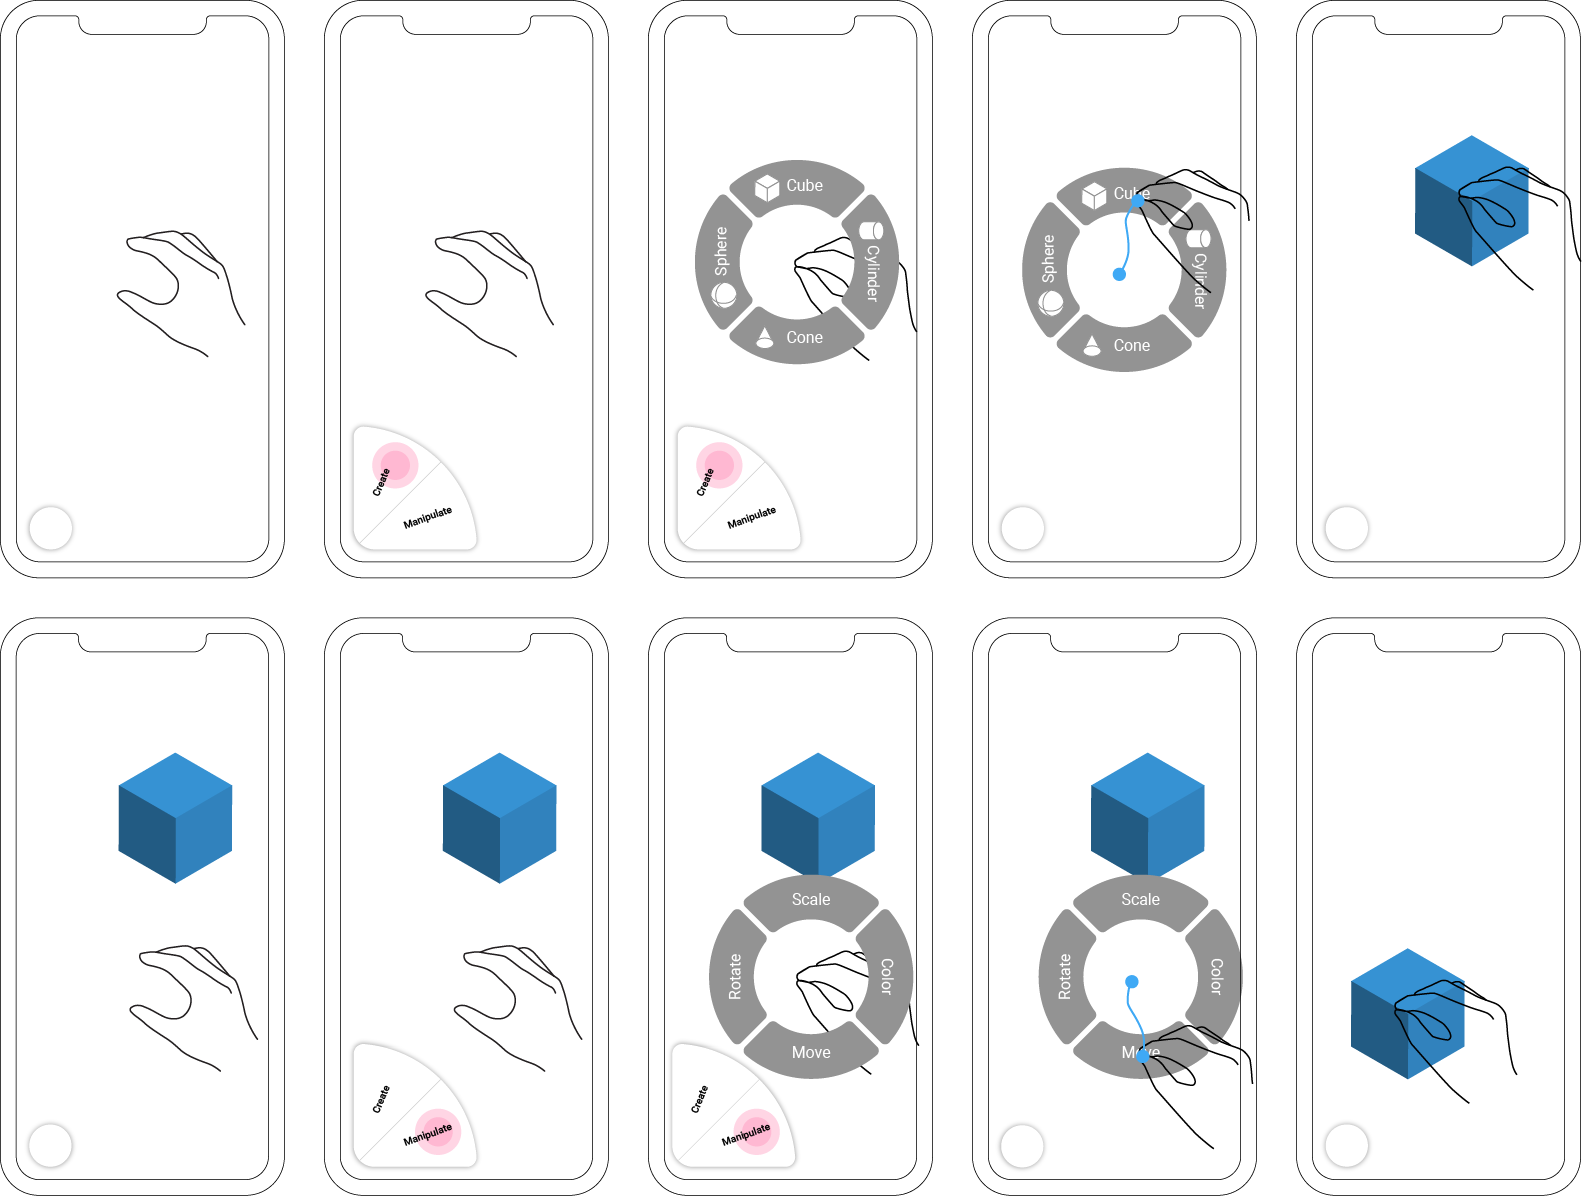
After doing the initial research, I brainstormed solutions through sketching on paper and in Figma. This allowed me to quickly visualize and formalize my ideas. Below is a draft flow of creating a simple cube.
After I consolidated my ideas more in 2D media, I started to prototype interactions in Unity. With my previous development setup for Portal-ble, I was able to quickly hook up a Leap motion controller to my computer and build some simple freehand interactions. Translating 2D sketches into working prototypes allowed me to see constraints of my initial designs and make improvements.
Using Unity XR and Xcode, I deployed test apps to my phone to test prototypes in the actual smartphone AR environment. This allowed me to catch many usability issues and discover edge cases that weren’t visible to me in the previous steps. This is the stage in which I spent the most amount of time. Below are example iterations showing how the AR menu design and object creation flow evolved.
Menu · Iteration 1
Menu · Iteration 2
Menu · Iteration 3
Cube · Iteration 1
Cube · Iteration 2
I took a similar approach as above to design the 2D UI interactions. I first sketched out some ideas and then prototyped them in Figma and After Effects to see how they would function in a high fidelity manner. Finally, I brought my designs to Unity and tested them along with AR interactions in complete task flows.
UI · Step 1
UI · Step 2
UI · Step 3
Before COVID-19 hit, I was able to conduct a few user testing sessions in which participants were asked to create a 3D chair model for a desk. Metrics like time to completion, number of commands, and a quantitative evaluation of the final model were recorded. The model shown on the right is created by one of the participants. Below are some insights I learned:
Users were able to create models with real-life dimensions
Many users could build chair models with a reasonable seating height and realistic seating area because they have objects like the desk and their own body as references.
The combination of 2D UI and AR interactions helped users to quickly select tools they need while reducing visual cluster
Some users commented that they liked the minimal presence of on-screen UI and the AR UI interactions were intuitive for them to learn and use. They liked that the 2D UI was used for persistent actions while AR UI is reserved for tool selections.
Creating 3D models using FoamAR can be physically tiring
One major usability issue brought up by users is that, although prototyping directly in 3D is fast and provides essential context, it can be physically tiring because they also have to move around a lot more to create 1:1 scale models.

Here I present my final design of FoamAR, an AR 3D prototyping app. It supports all the core functionalities of a traditional 3D modeling software - creating, moving, rotating, and scaling 3D primitives. It utilizes a combination of traditional 2D on-screen UI and intuitive freehand AR interactions for users to quickly locate and invoke various tools without seeing a packed screen or going through layers of menus.
Please refer to the information architecture diagram for all the tools in FoamAR and later sections for how each feature works.

FoamAR can greatly simplify the workflow of industrial designers. Instead of taking photos and measurements of a site, they can now pull out their smartphone when they are at the site and pinch and drag virtual 3D objects to build out their ideas. When they get back to their studio, they can directly export their 3D sketch models created in FoamAR with appropriate dimension to desktop CAD software for refinement. You can see that FoamAR halves the number of step needed in the workflow comparison chart below!
To use FoamAR, a user would hold the phone on one hand and use the other hand to interact with virtual objects. Because of this set up, I designed a set of 2D on-screen UIs for for their phone-holding hand and a set of AR UIs for their free hand.
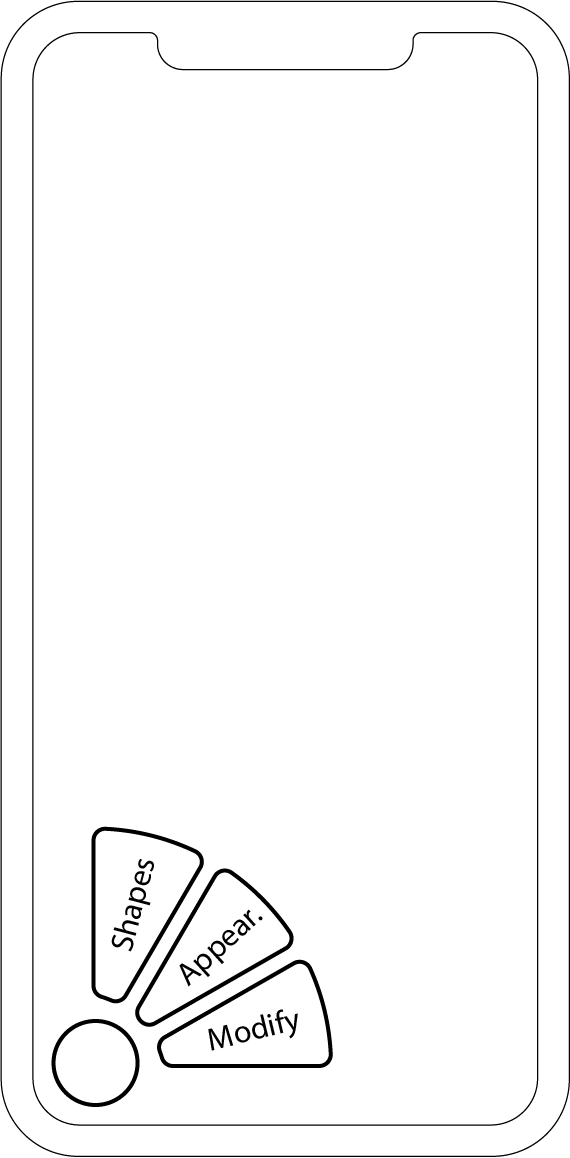
The 2D on-screen UI consists of a status indicator at the top and an action button that expands into a fan when clicked on, along with two round buttons for undo and redo. The expanded action button is mainly used to switch between two modes - the AR object creation mode, in which a user can create different 3D primitives, and the AR object manipulation mode, in which different tools are available for users to manipulate primitives.

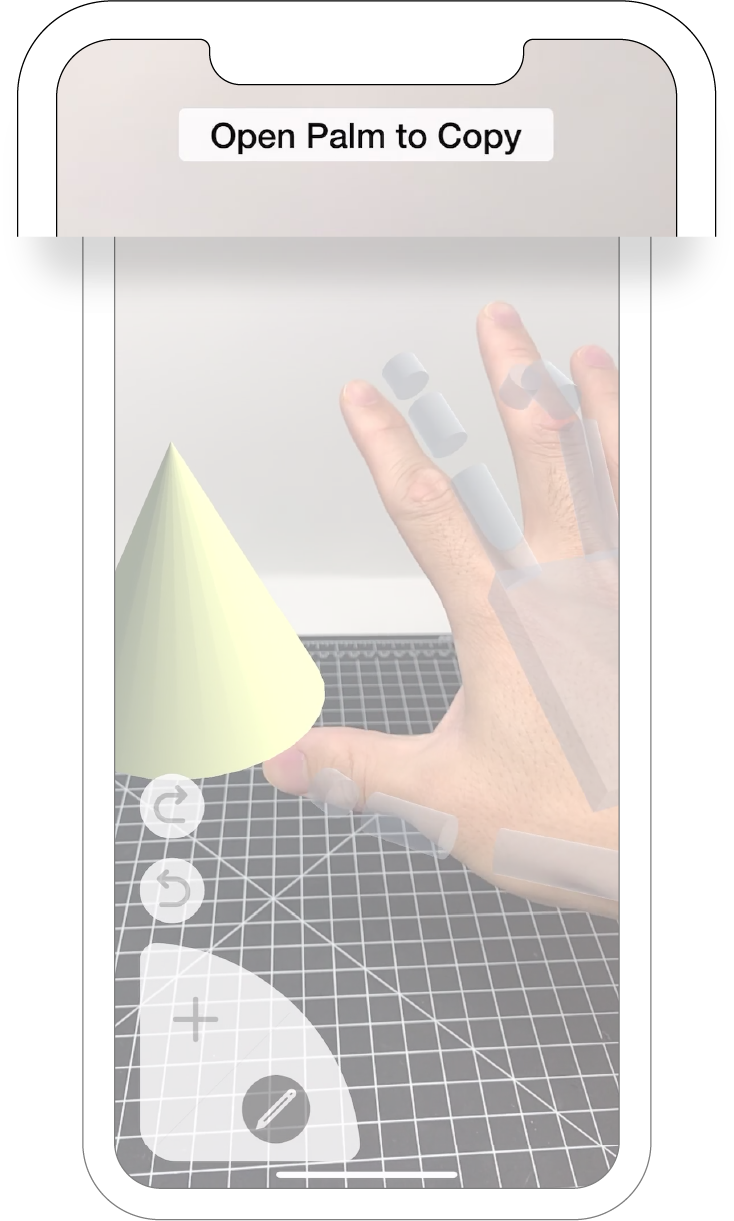
This component is designed to inform users with the current interaction mode they are in (creation and manipulation) and display helper messages to guide them complete certain actions. The example below shows how the status indicator aids a user to complete the workflow of copying an object.

In either interaction mode (creation and manipulation), a user can open its main menu by doing a pinch gesture. The AR menus contain options corresponding to the selected mode. To trigger a menu option, a user can move their hand to that area and unpinch. This gestural sequence takes advantage of the nature of muscle memory and enables power users to quickly and repeatedly trigger desired options. The radial form factor is chosen for its scalability and intuitiveness to use.
Although the on-screen and AR radial menus could cover a lot of use cases, I needed a way for users to quickly trigger object-specific options like deletion and duplication. This was similar to “right-clicking” on an object with a mouse. My solution for this is the AR object menu. Users can invoke the menu by dwelling their hands in an object until it completes a blinking effect. Users can then move and dwell their index fingers on the option they want, and a ripple effect is triggered. When the ripple completes expanding, that option is triggered.

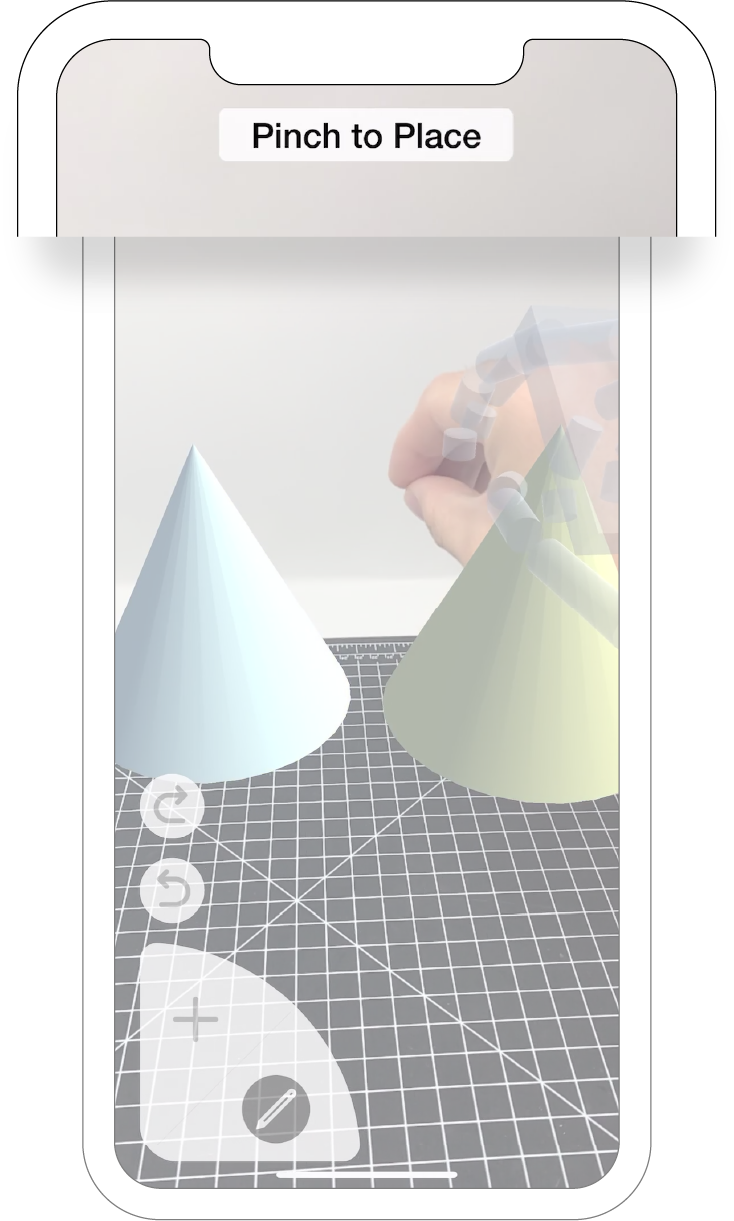
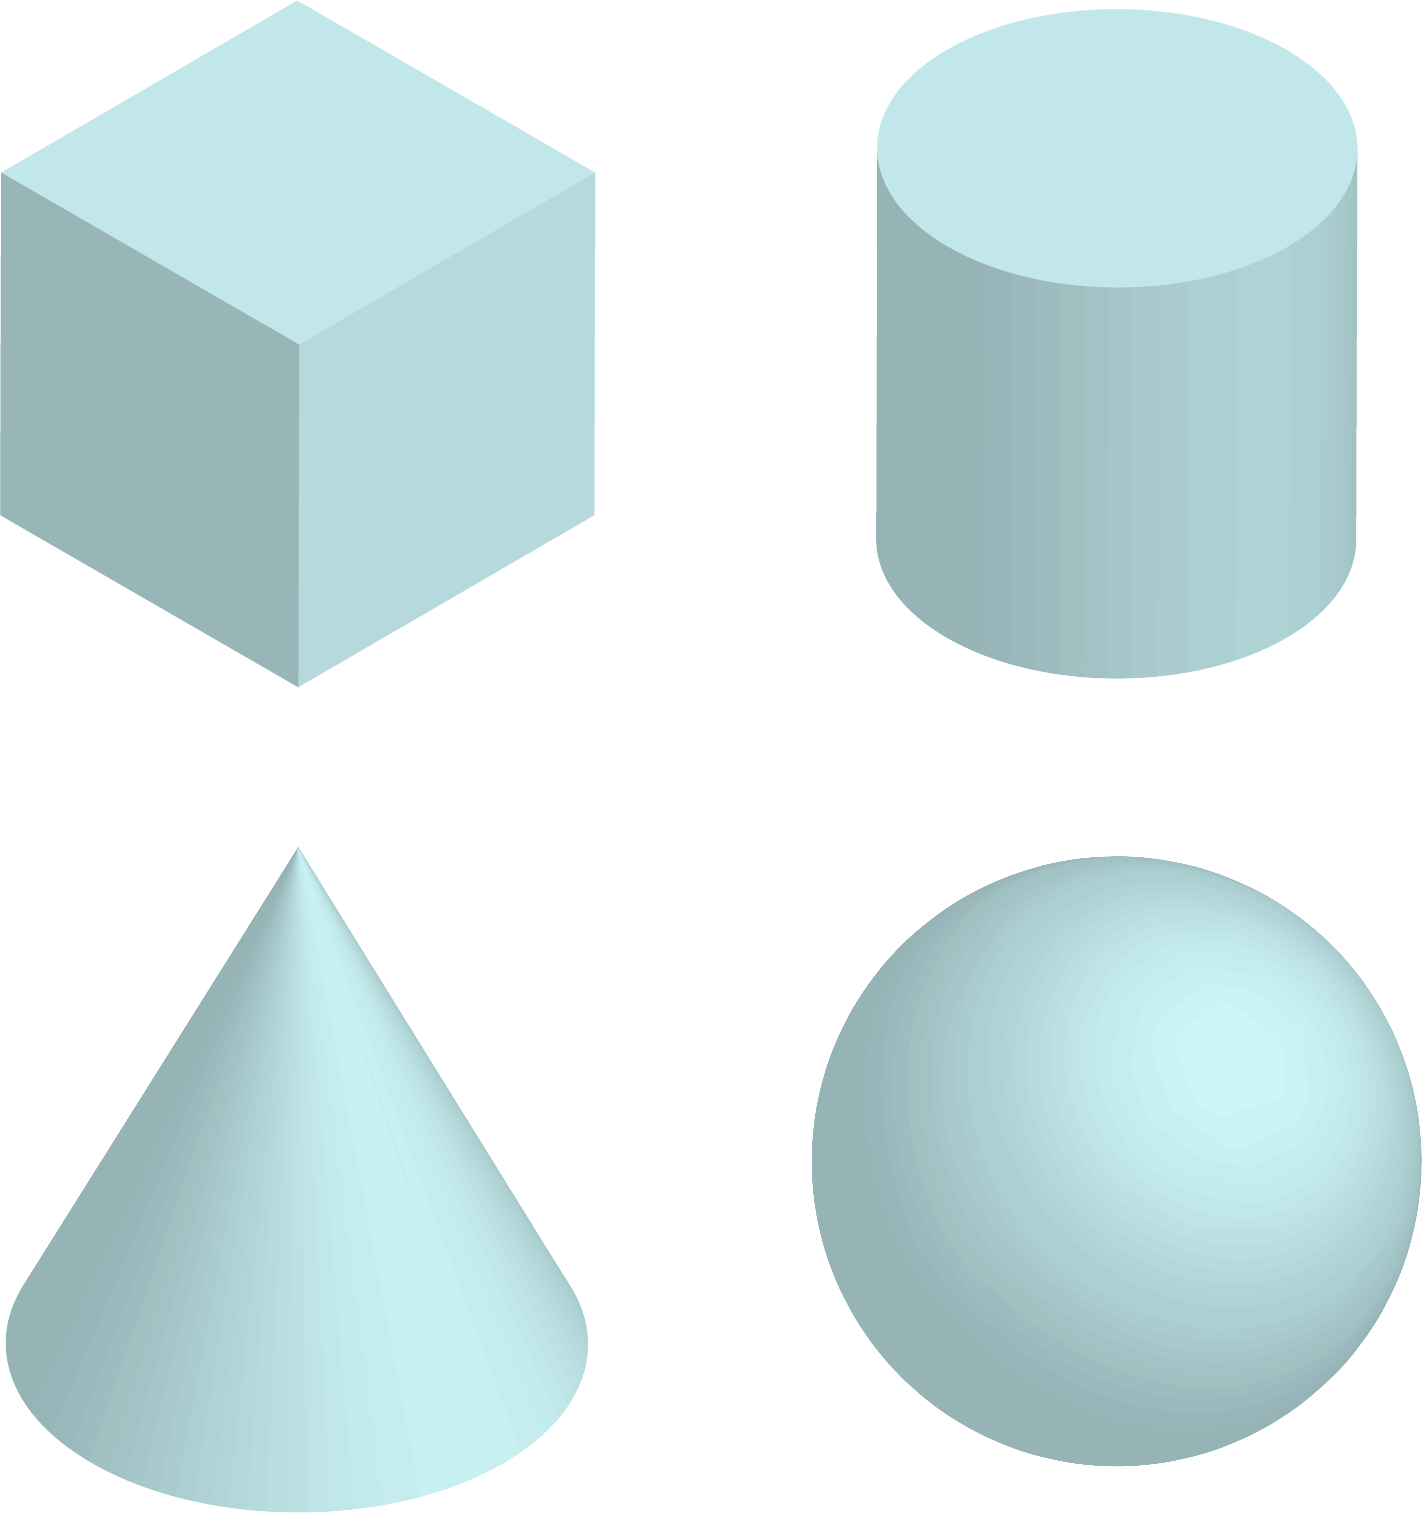
The first step to create any 3D models is to create a primitive. As the first of the two main interaction modes, the AR object creation mode offers four options: cube, cylinder, cone, and sphere. As described above, a user can trigger and select an option through the pinch-unpinch gestural sequence. Immediately after unpinching, the selected primitive would blink and scale up from the user’s palm. They can move their hand around the space to choose a location and pinch again to place the newly created object.

After primitives are created, users would spend the majority of their time in the AR object manipulation mode, in which they can move, rotate, scale, copy, and delete objects.
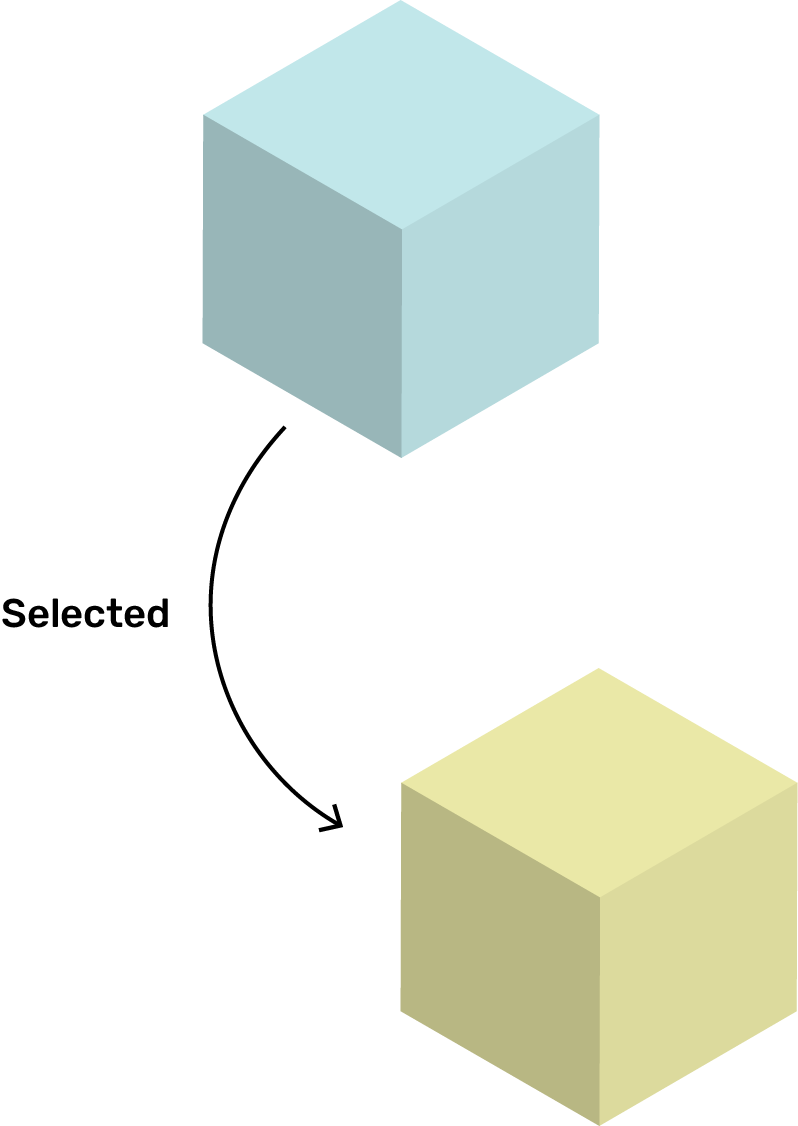
As the default option of the manipulation mode, the selection tool allows users to select an object to manipulate further by touching it. The selected object turns yellow and currently only one object can be selected at the same time. The other major use of the selection tool is to open the AR object menu for the selected object.
While using the selection tool, a user can trigger the object menu through dwelling and choose from two object-specific actions - copying or deleting. Copying an object follows a similar flow as creating an object: unpinch to create the object, and pinch to place it. Deletion works just the way you think - trigger the action, and say goodbye to that object!
Copy
Delete
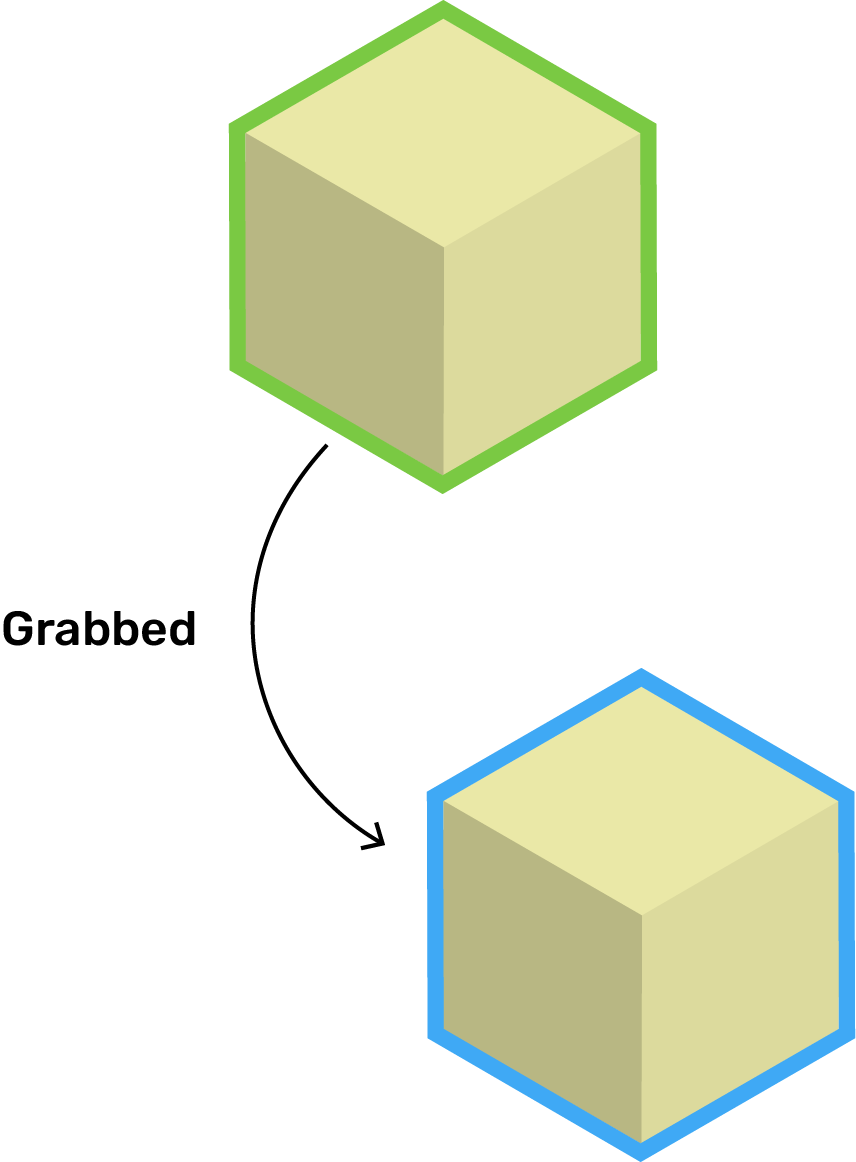
This is one of the most intuitive tools in FoamAR. Want to move or rotate an object? Simply grab it with your hand and move it around, just like how you would move or rotate a real-life object! This tool was the focus of my AR research project Portal-ble, so features like colored outline to indicate affordance and interaction states are already built-in.
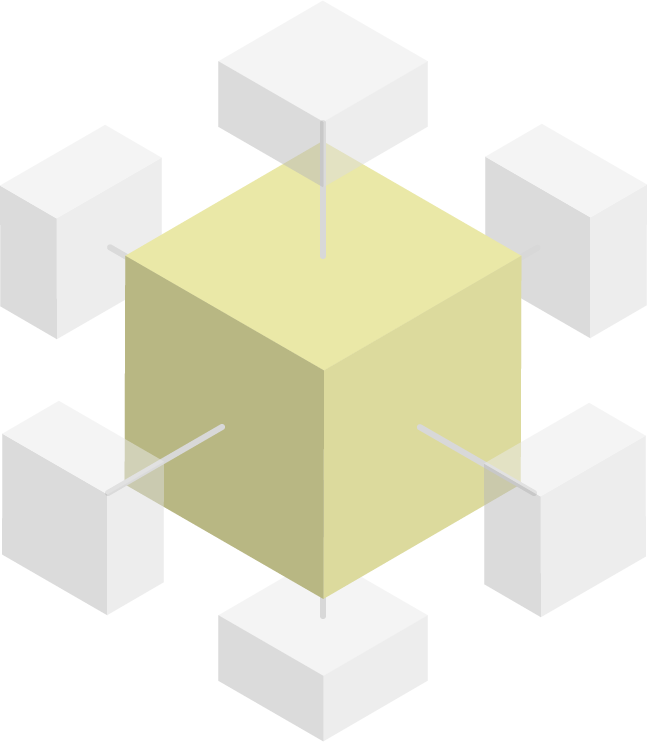
This function is the exemplar of a satisfying AR experience. When using the scaling tool, a user can simply grab one of the six tabs that appear around the selected object to stretch it out and push it in along one dimension. Creating a leg for a chair? Just stretch a cylinder from the floor to your desired height!
Made a mistake? Worry not! We have undo and redo for you, the power couple that all creativity software should have.
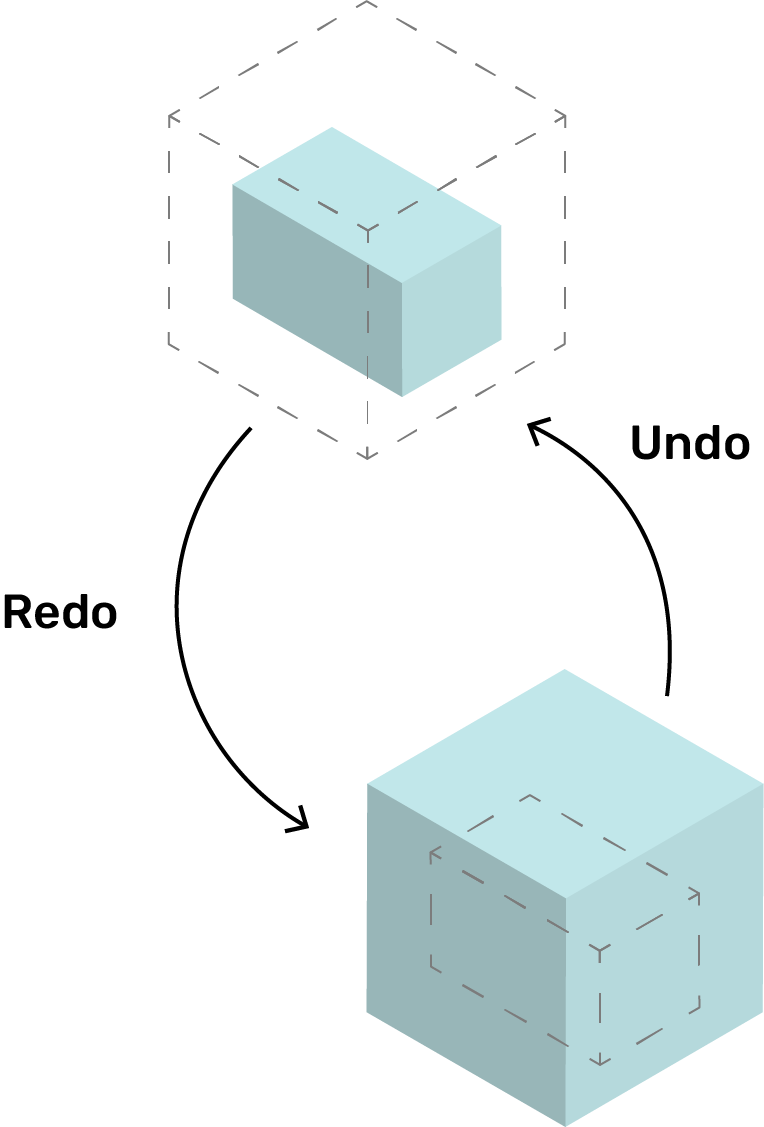
Finally, here is the visual system that made the FoamAR experience coherent throughout 2D and 3D spaces. Were you wondering why I chose those two specific shades of blue and yellow? They were inspired by the colors of foams used by industrial designers to build physical prototypes! The blue foam is softer and more widely used for low-fidelity or large-scale models, while the yellow foam is tougher and thus can be use it to create high-fidelity models with finer details.